如何安裝 Google Coral TPU 到 PVE 的 Frigate
前言
為什麼有了 iGPU 還需要 Coral TPU?
目前的 Frigate 是透過 Intel 8700 的內顯跑 OpenVINO,以下大致整理三個差異。
運算架構的本質不同
iGPU (OpenVINO): 本質上是為了繪圖與影像編碼(QuickSync)設計的。雖然它能兼職跑 AI 辨識,但它必須同時處理「影像串流解碼」與「物件偵測」,負擔較重。Coral TPU: 是專為 Tensor 運算設計的 ASIC(特殊應用積體電路)。它不做其他事,只專精於跑 AI 模型,因此效率極高。
推論延遲
- iGPU: 偵測一幀畫面通常需要 30ms - 70ms 左右(視型號與模型大小而定)。
- Coral TPU: 同樣的模型通常只需 5ms - 10ms。在多路攝影機併發偵測時,Coral 的排隊延遲(Queue Time)會低得多。
資源分配的優化
- 讓 iGPU 負責「解碼 (Decoding)」: 使用 Intel QuickSync 處理 H.264/H.265 串流。
- 讓 Coral 負責「偵測 (Detection)」: 處理物件辨識。
準備工作
當前我的設備如下:
- 硬體:HP 800G5 DM
- 系統:Proxmox 9.1.6
- Frigate 版本:0.17.0
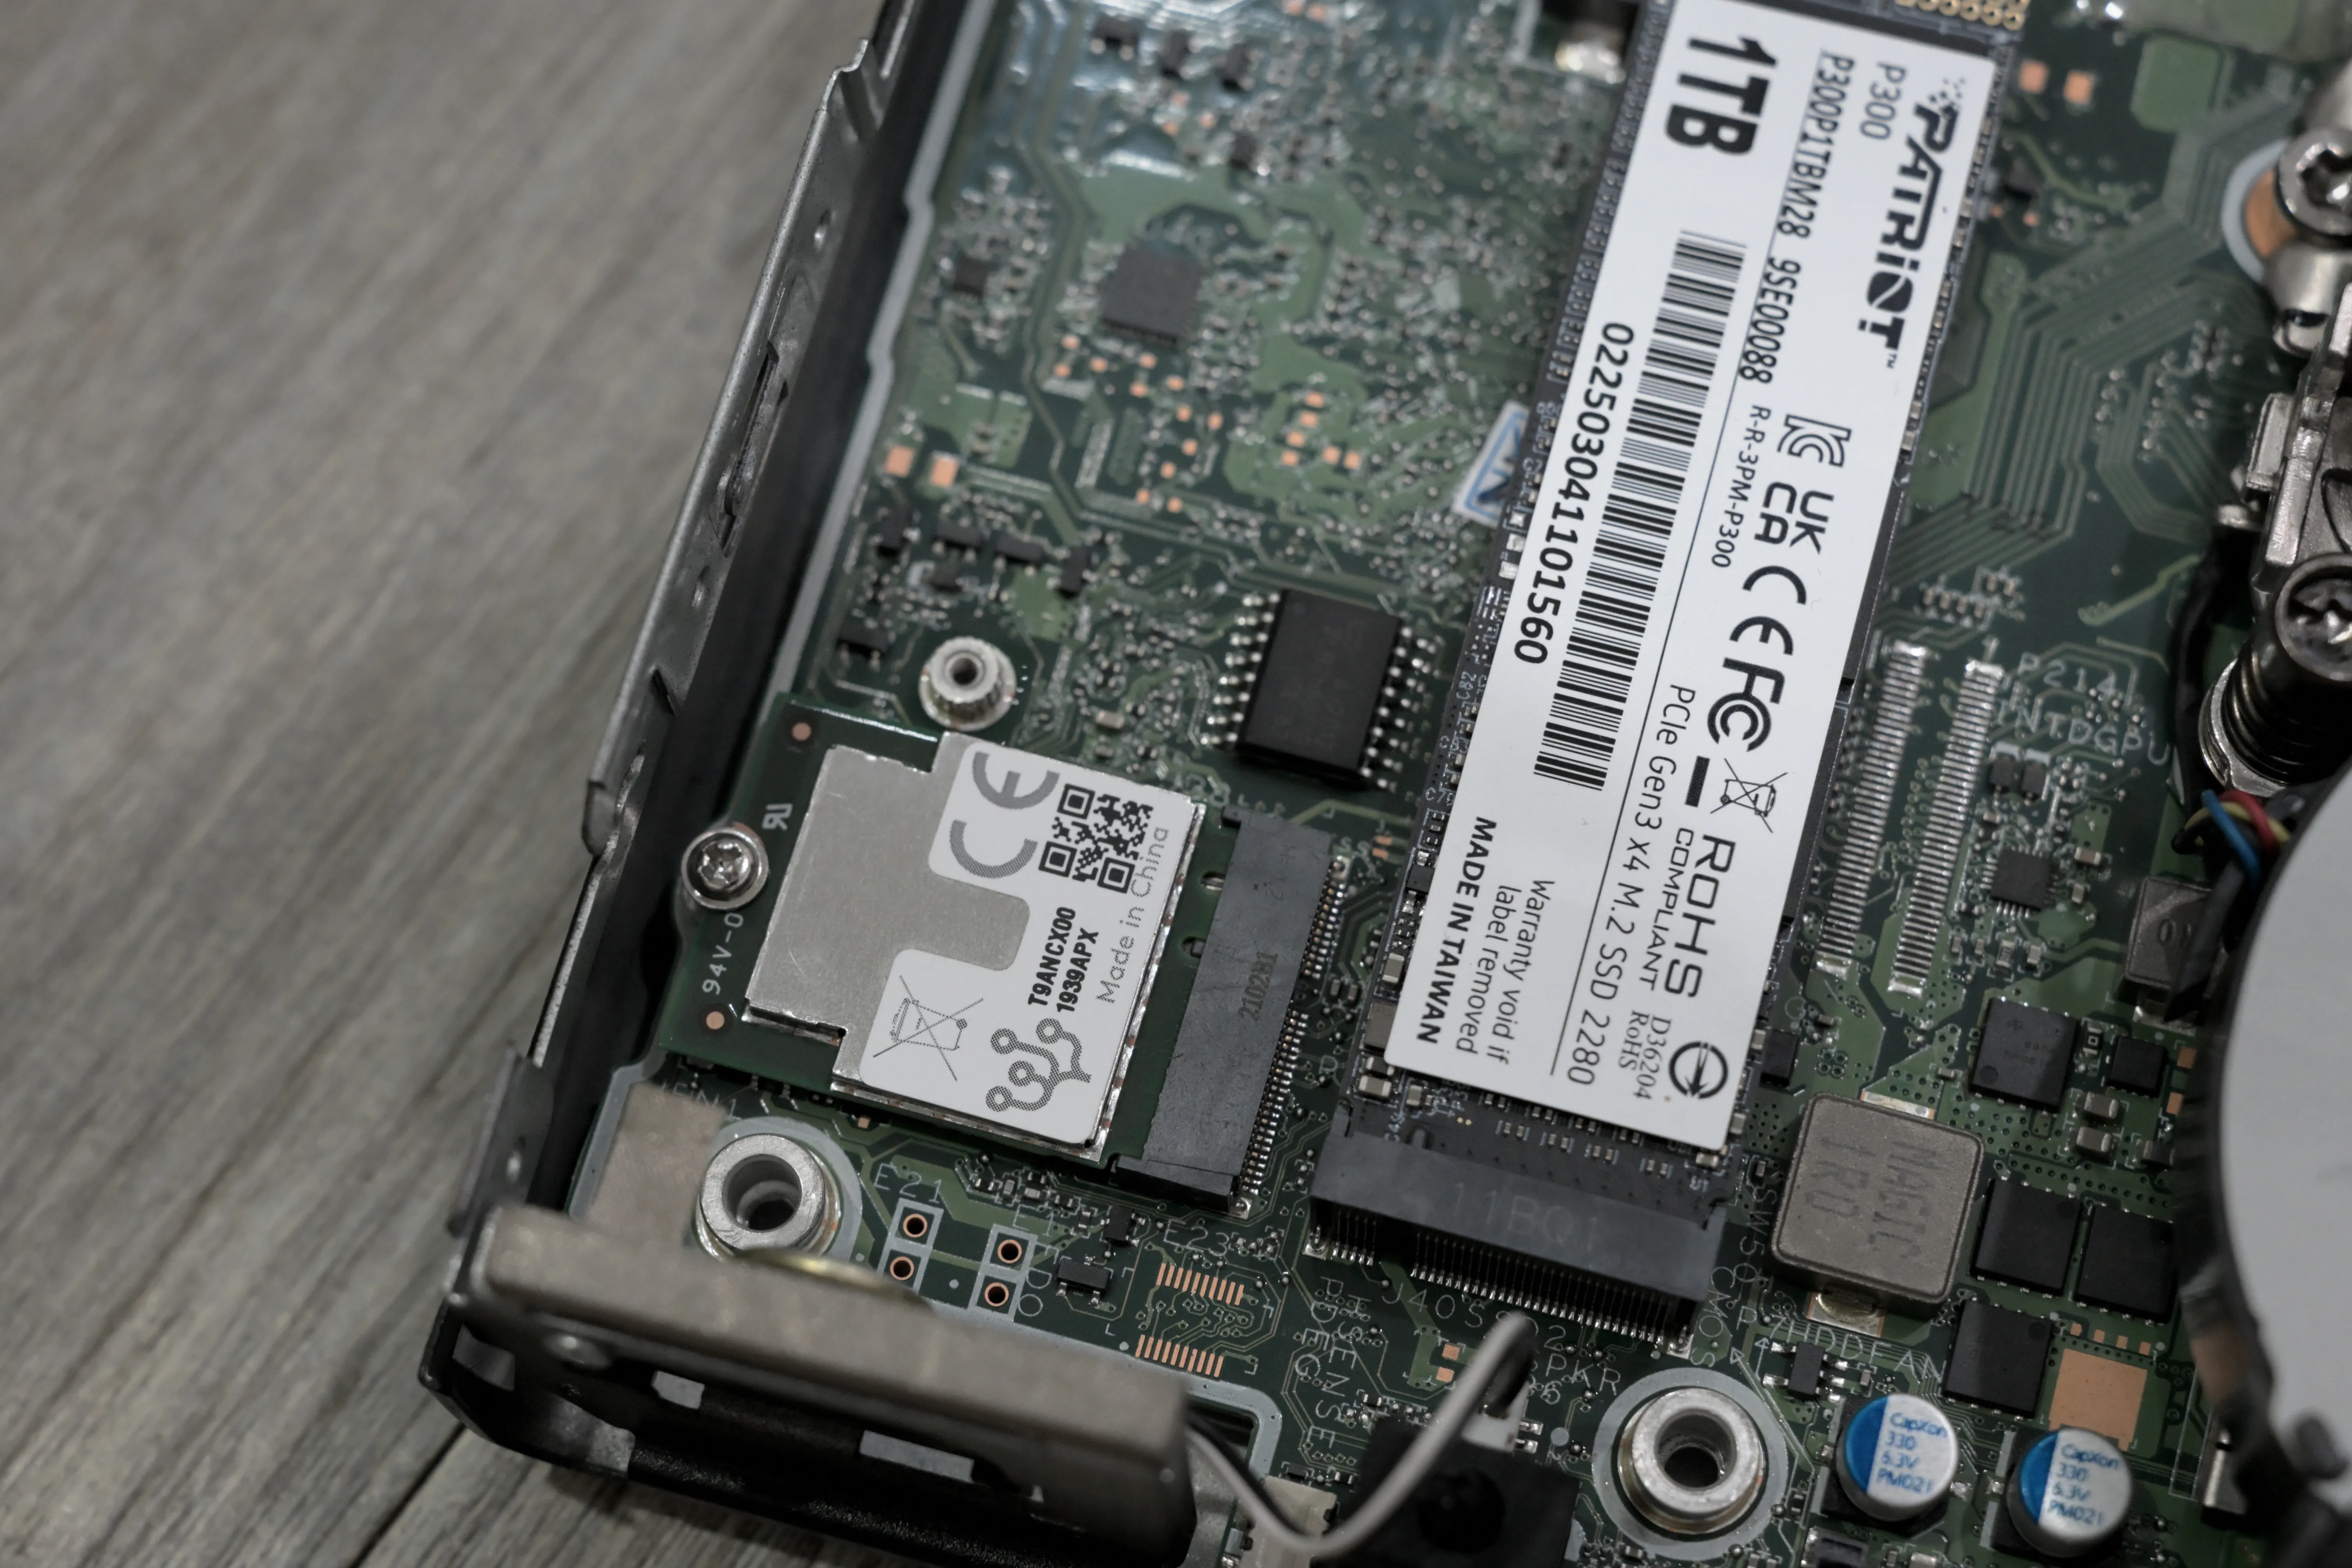
因為不太喜歡在主機外面插東西,剛好這台主機有一個 WiFi 在用的 M.2 插槽,所以我就買了一個 M.2 A+E Key 版本的 Google Coral TPU。
設定工作
Step 1 - Proxmox
硬體裝好 Coral TPU 後開機,用以下指令掃描看看硬體是不是真的有抓到
lspci -nn | grep 089a我出現了以下字樣,這樣就是有抓到了吧!
System peripheral [0880]: Global Unichip Corp. Coral Edge TPU [1ac1:089a]原本以為會是很簡單的安裝,結果搜尋網路上發現這一段話:
Google abandoned the drivers for it, their documentation errors out on every step for the Debian and Ubuntu install.
然後有人回覆說:
Yes you will need to compile the driver yourself, instructions are easy to follow.
我在網路上找了兩種方式,第一種就是在 pve shell 中開始安裝一些東西來編譯,然後再透過 clean.sh 之類的清理指令來刪除後續用不到的東西。
上面這種方式太麻煩了,所以我又找到另一種方式是透過 LXC 來做這些事情,然後只拿最後編譯完成的檔案,結束後刪除整個 LXC,這樣是最乾淨的編譯方式。
因為作者有客製化一些儲存的位置,所以要改一下腳本的參數,好了後就在 PVE 中
nano build-tpu-driver.sh然後貼上改好後的 script 直接:
./build-tpu-driver.sh這腳本做的事情大概是這樣
- 建立 Debian 13 的 LXC
- 安裝編譯工具
- Clone Coral repo
- 下載與 PVE 一樣的 headers
- Cloner Google gasket 驅動
- 分支切換到
pull/50/head:pr-50 - 開始編譯驅動
但我安裝完出現:
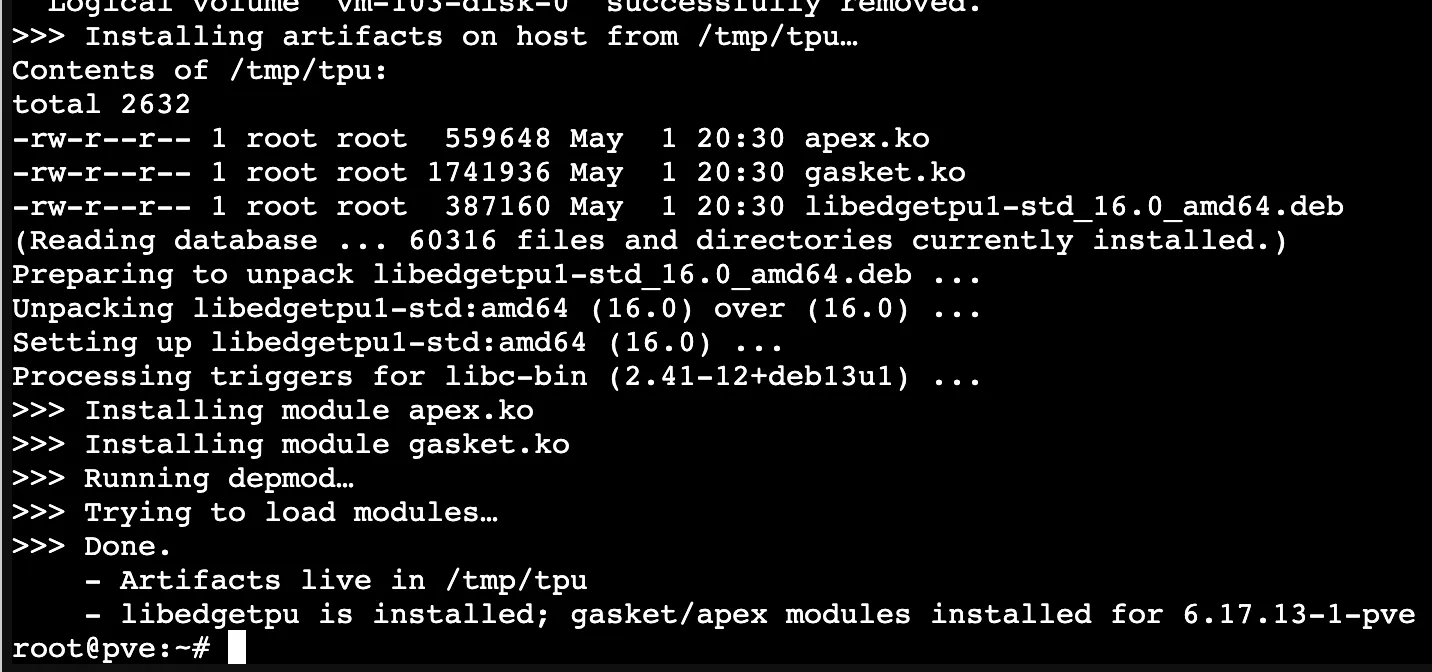
Processing triggers for libc-bin (2.41-12+deb13u1) ...

>>> Installing module apex.ko

>>> Installing module gasket.ko

>>> Running depmod…

>>> Trying to load modules…

modprobe: ERROR: could not insert 'gasket': Key was rejected by service

WARNING: modprobe gasket failed, check dmesg for details.

modprobe: ERROR: could not insert 'apex': Key was rejected by service

WARNING: modprobe apex failed, check dmesg for details.

>>> Done.

    - Artifacts live in /tmp/tpu

    - libedgetpu is installed; gasket/apex modules installed for 6.17.13-1-pve
用指令
dmesg | grep -i secure出現:
[ 0.000000] secureboot: Secure boot enabled因為我的 HP EliteDesk 800 G5 DM 有 Secure boot 他不信任這個驅動,只能等下次到主機上的時候進入 BIOS 設定。
現在輸入 modprobe 都是錯誤:
root@pve:~# modprobe gasket
modprobe: ERROR: could not insert 'gasket': Key was rejected by service
root@pve:~# modprobe apex
modprobe: ERROR: could not insert 'apex': Key was rejected by service
後來到電腦的 BIOS 關閉 Secure boot 我的自簽驅動就過了
進到 pve 把 frigate 的賦予 apex 硬體直通然後重新啟動。
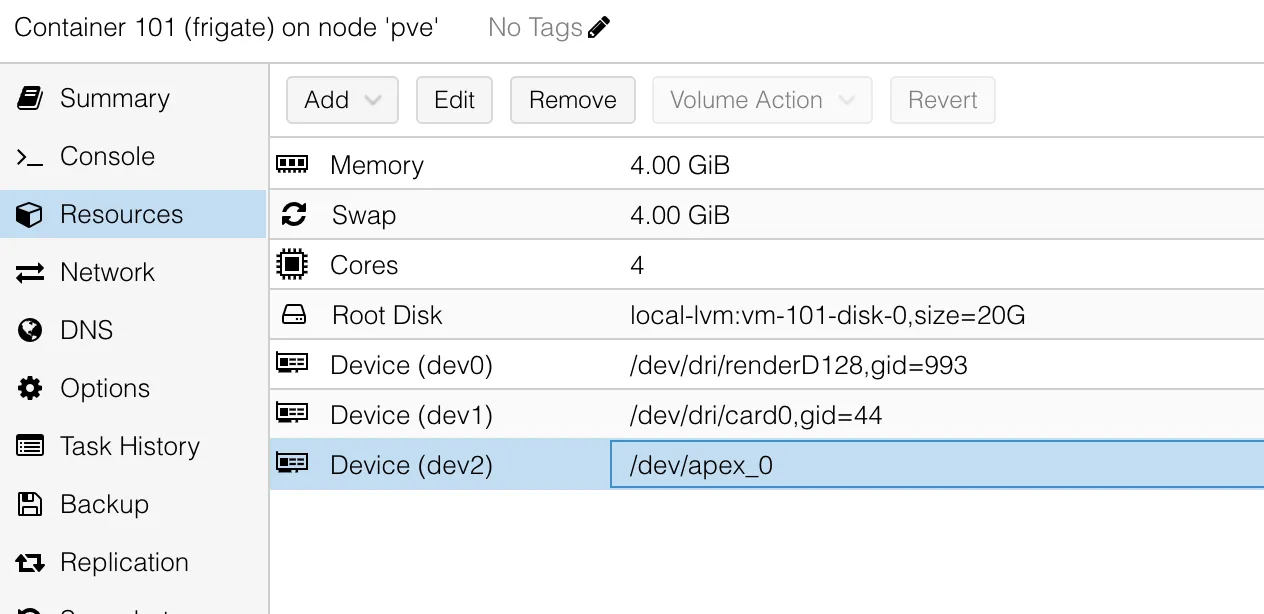
更新 docker-compose.yaml 的 devices
devices:
      - /dev/dri/renderD128:/dev/dri/renderD128 # 核心透傳
      - /dev/dri/card0:/dev/dri/card0
      - /dev/apex_0:/dev/apex_0 # M.2/PCIe Coral TPU
因為我要導入 Yolo 模型,然後我到官網看這一篇文章,結果 26 版本 frigate 還沒有支援,所以只好退版到 9
我從以下地方下載 model 跟 label
然後把模型放到 frigate 的 /config/model_cache 內,並且更新 config detectors、model 兩塊為以下:
detectors:
coral:
type: edgetpu
device: pci:0
model:
model_type: yolo-generic
width: 320
height: 320
input_tensor: nhwc
input_pixel_format: rgb
input_dtype: int
path: /config/model_cache/yolov9-s-relu6-best_320_int8_edgetpu.tflite
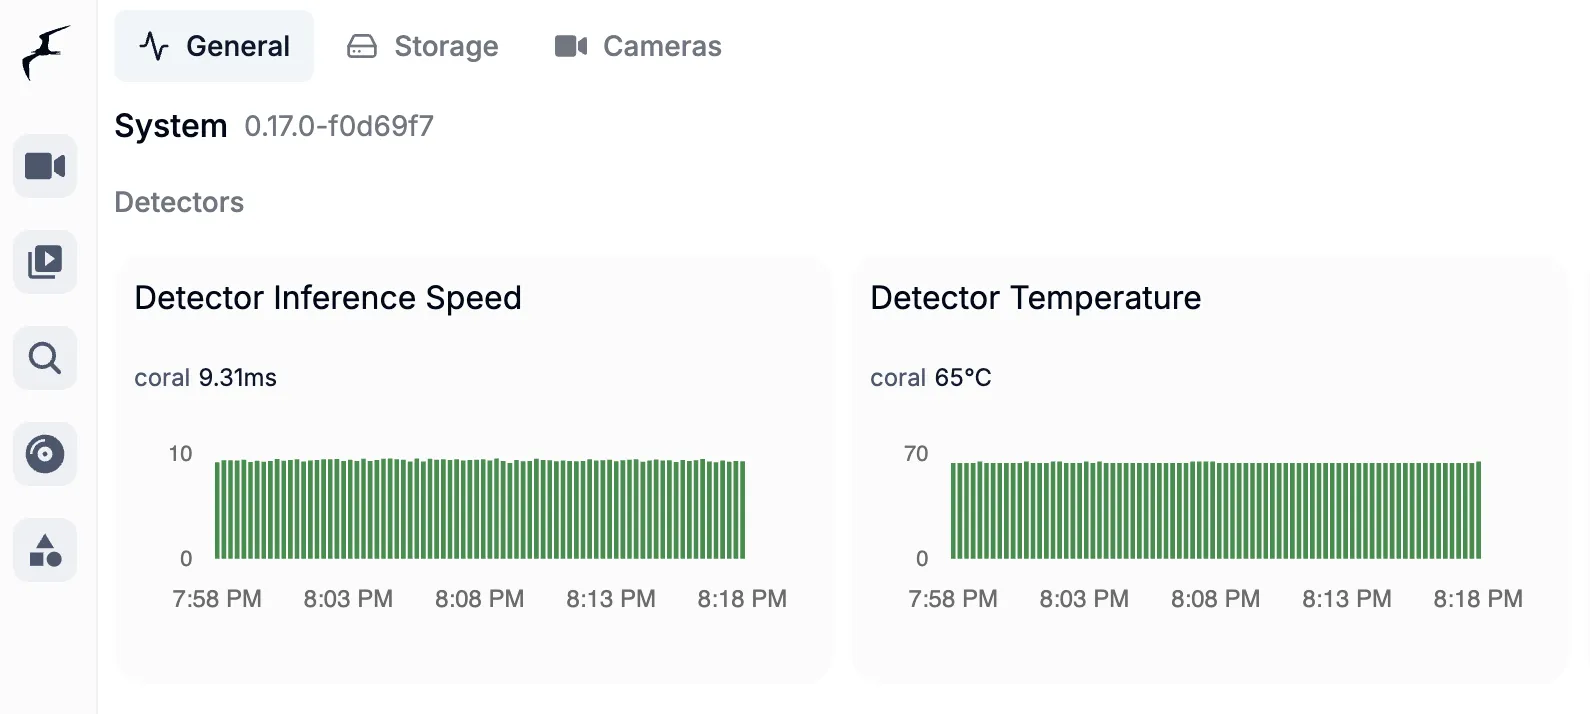
labelmap_path: /config/labels-coco17.txt重新啟動 frigate 可以看到正常抓到 Coral 並且套用在模型推理上了!大功告成!!!!